|
Can't find what you need? Request a disassembly manuals and we will try to locate it and add it to our database.
If you like this manual recomend it to your friends...
| | |
| |
| |
|
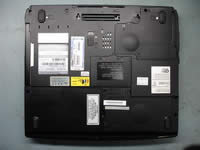 |
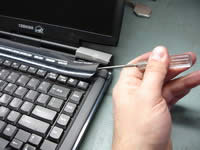
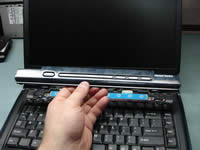
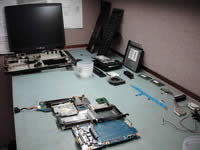
STEP 1
As with any laptop, start disassembly process with unlocking and removing the battery.
|
| |
|
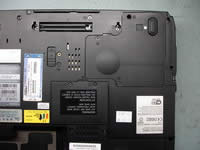 |
STEP 2
Now remove three screws securing the heatsink/CPU cover and remove the cover.
Remove two screws from the memory modules cover and remove the cover.
|
| |
|
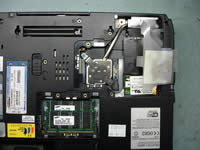 |
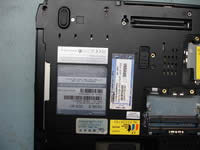
STEP 3
The laptop on this photo shows 2 memory modules installed (bottom arrow). To remove the memory module, spread the latches on both sides of the module until it pops up at 30 degrees angle. After that grasp the memory module for its sides and pull from the socket. Do the same with the second stick.
Now remove two screws securing a metal bracket over the CPU heatsink. Remove the bracket and lift up the heatsink from the CPU. Clean old thermal grease off the CPU and the heatsink.
If you need to replace the CPU, you can do it now. Just unlock the CPU socket by turning the screw into "open" position and carefully lift up the CPU from the socket on the motherboard. I'll do it in the step 25.
|
| |
|
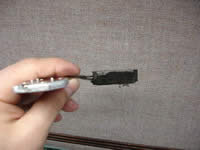 |
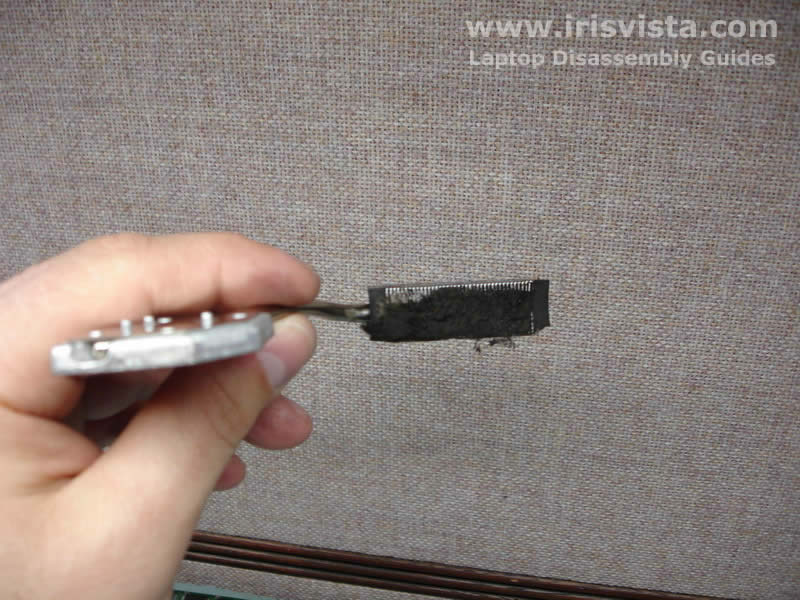
STEP 4
If your heatsink looks like this one, then most likely the laptop experience an overheating issue. When a laptop overheats it usually shuts down by itself without any reason when you ran CPU intensive applications. Clean up the heatsink and the problem will go away.
|
| |
|
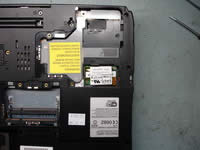 |
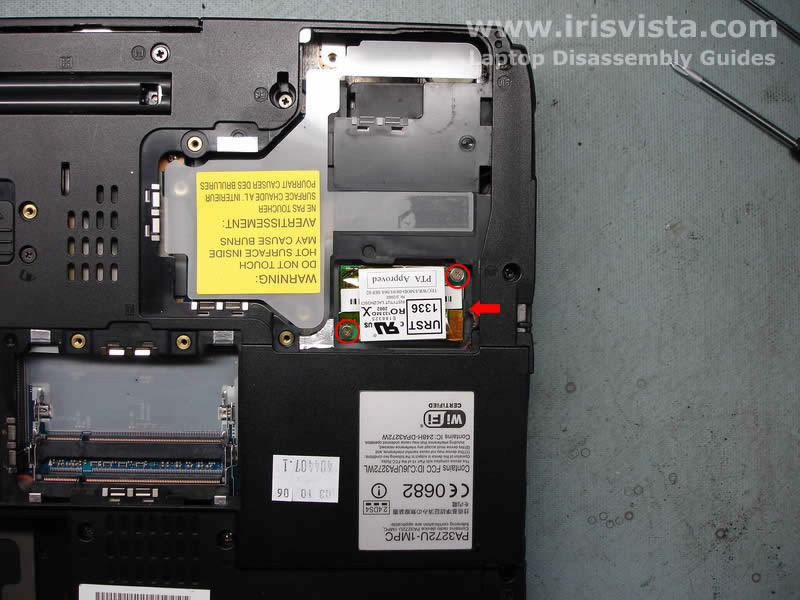
STEP 5
At this step remove two screws securing the modem card. Carefully lift up the modem and disconnect the cable connected to it (shown with a red arrow).
|
| |
|
 |
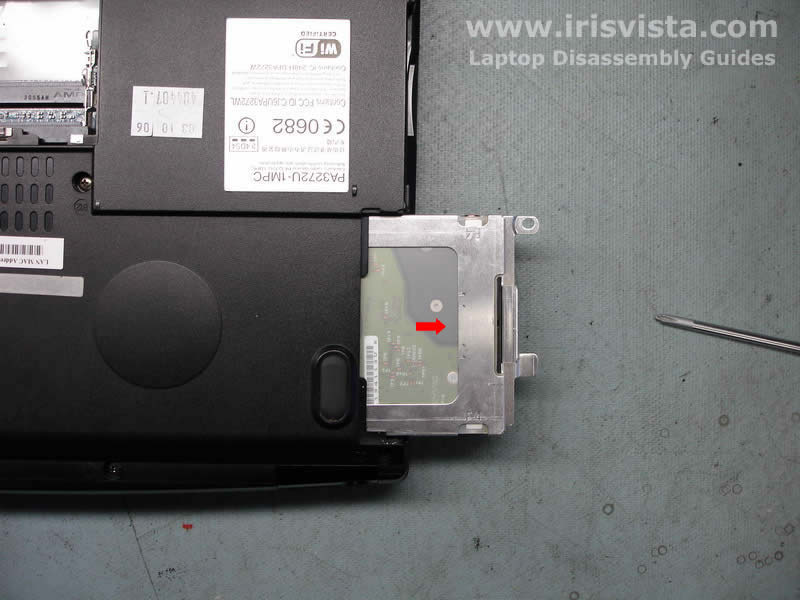
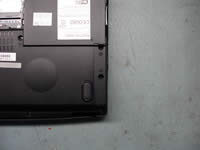
STEP 6
Remove one screw securing the DVD drive.
Push the lock into "unlocked" position and pull the DVD drive from the laptop.
|
| |
|
 |
STEP 7
Remove two screws from the hard drive door and remove it.
|
| |
|
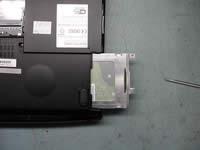 |
STEP 8
Pull the hard drive to disconnect it from the motherboard and remove it. If you are replacing the hard drive, you'll have to transfer the hard drive bracket. It's easy. Just remove a few screws on the side of the bracket, remove the bracket from the old drive and transfer it to a new hard drive.
|
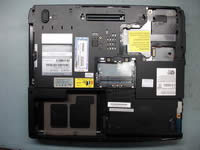 |
STEP 9
Now it's time for a fun part. Remove all screws marked with a red circle and mark them somehow so you are not confused during the laptop reassembly.
|
|
| |
|
 |
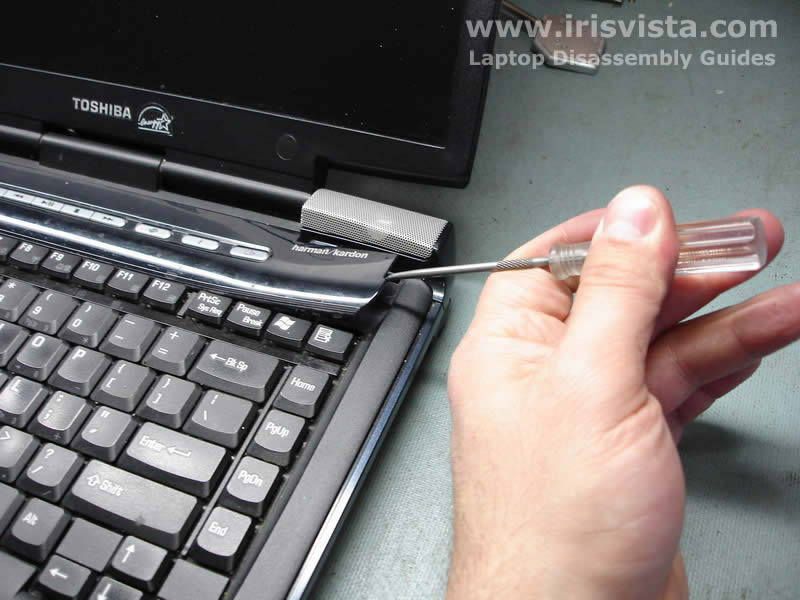
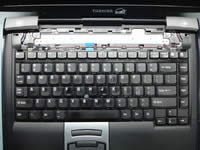
STEP 10
Turn the laptop over and start removing the keyboard bezel. You can use a flathead screwdriver for this step.
|
| |
|
 |
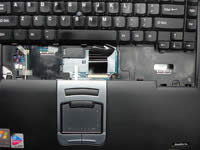
STEP 11
After you successfully disengaged all plastic latches, lift up and remove the keyboard bezel.
|
| |
|
 |
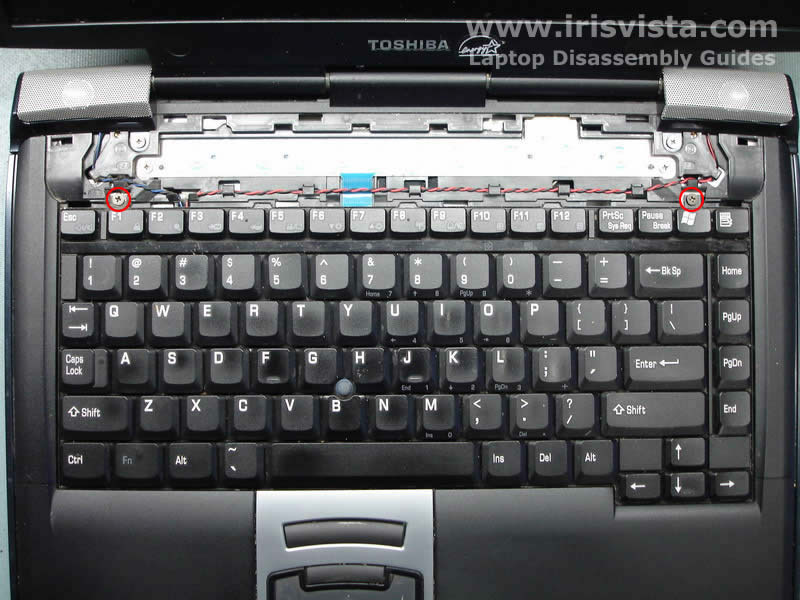
STEP 12
Remove two screws marked with a red circle and carefully lift up the keyboard. Be careful, because you still have a keyboard cable connected to the motherboard.
|
| |
|
 |
STEP 13
Turn the keyboard over and place it on the palmrest.
Remove one screw securing a metal cover over the keyboard connector.
|
| |
|
 |
STEP 14
Turn the keyboard over again and place it so you can access the connector on the motherboard.
Before you pull the cable and remove the keyboard, do not forget to unlock the connector by moving the lock (brown part, hard to see on the photo) away from the base (white part pointed with a red arrow) about 2-3 millimeters.
After the connector is open, pull the cable and remove the keyboard. BE VERY CAREFUL WITH THE KEYBOARD CONNECTOR.
|
| |
|
 |
STEP 15
Disconnect two cables connecting the laptop speakers to the motherboard and remove the cables from its route on the top cover.
Remove two screws securing the laptop speakers. To remove the speakers, slide the left speaker to the left and the right speaker to the right.
|
| |
|
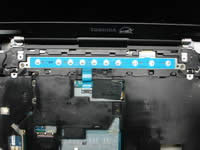 |
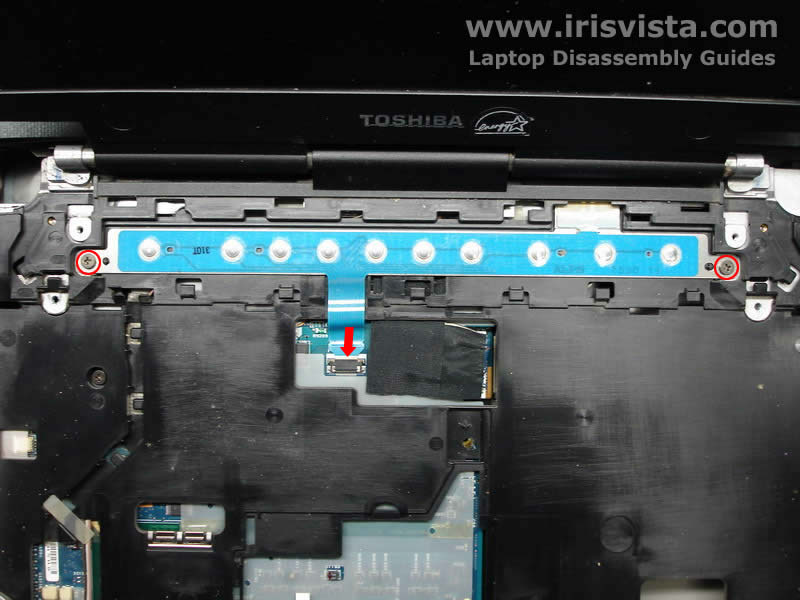
STEP 16
Disconnect the switch board cable from the motherboard (be careful with the connector).
Remove two screws securing the switch board and remove it.
|
| |
|
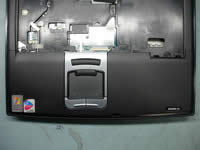 |
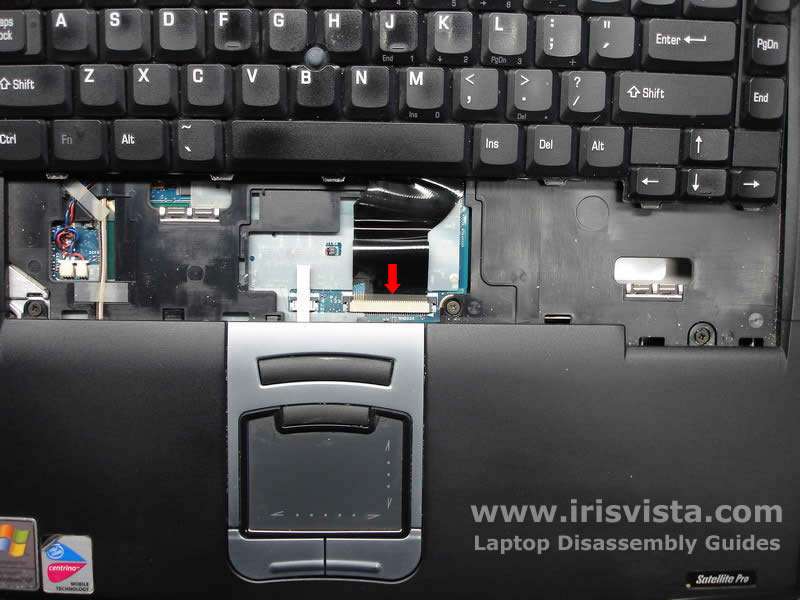
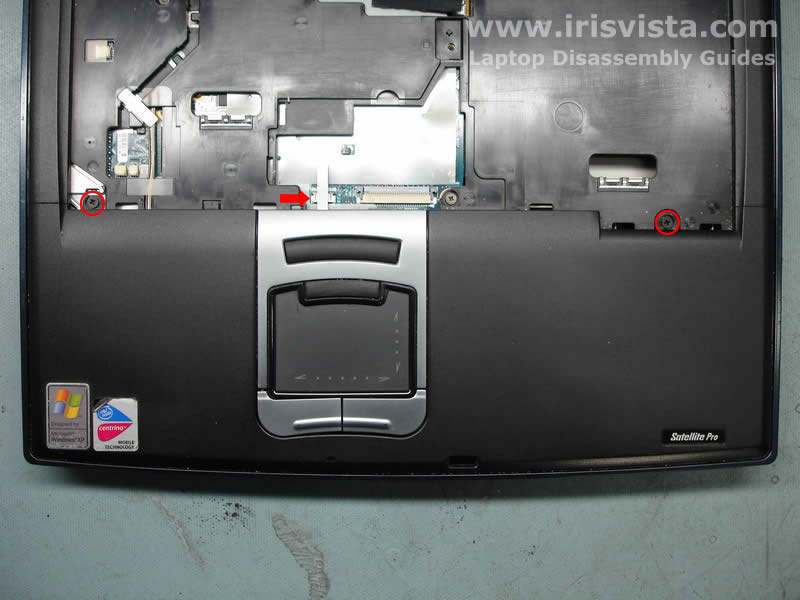
STEP 17
Now it's time to remove the laptop palmrest with the touchpad.
Remove two screws securing the palmrest.
Disconnect the touchpad cable from the motherboard, the connector is really small.
|
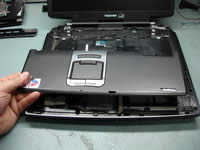 |
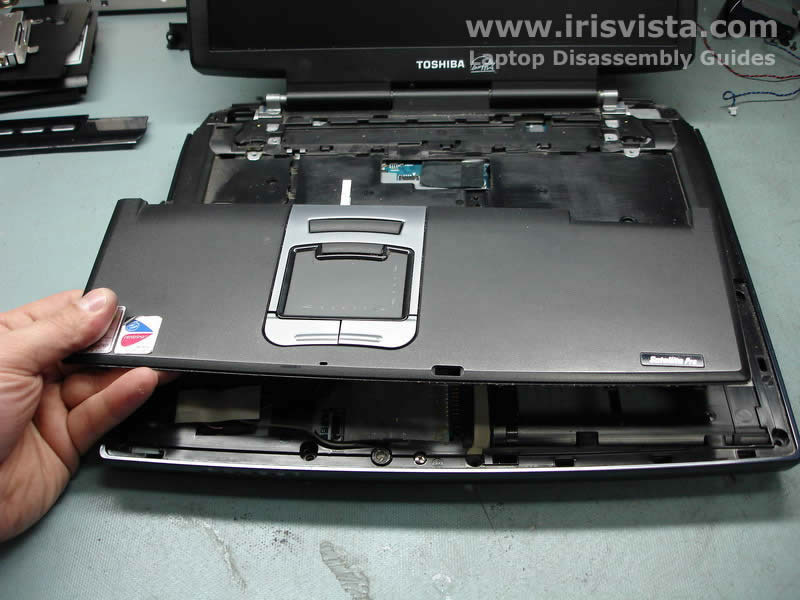
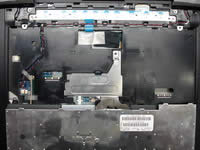
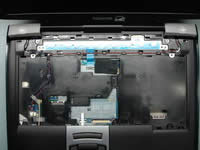
STEP 18
Lift up the palmrest and remove it.
|
|
| |
|
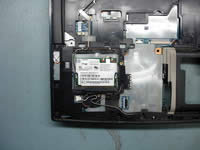 |
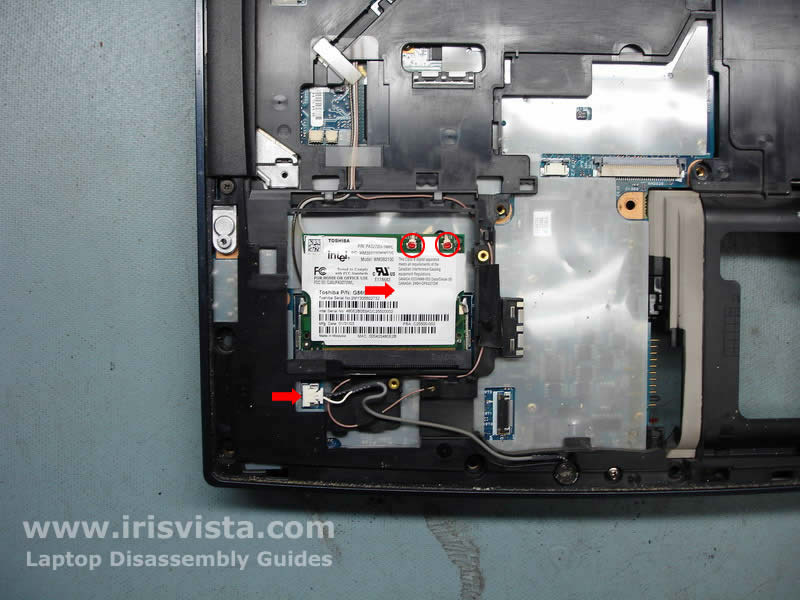
STEP 19
In this model the wireless card is located under the touchpad and you can remove the wi-fi card right after you removed the touchpad.
Disconnect the white (main) and the black (aux) wireless antenna cables. Grasp the antenna cable connector with your fingers and carefully lift it up. Do the same with the second cable.
After wireless antenna cables are disconnected, spread the latches on both sides of the wireless card until the card pops up. Remove the wi-fi card from the slot.
Disconnect the internal microphone cable (bottom red arrow) from the motherboard and remove it.
|
| |
|
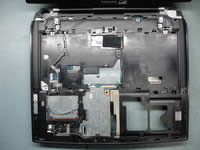 |
STEP 20
Remove four screws securing the laptop top cover to the laptop base.
Carefully pull the video cable connector (marked with a red arrow) from the connecotor on the motherboard.
Do not pull for the harness. Unplug the connector by its edges.
|
| |
|
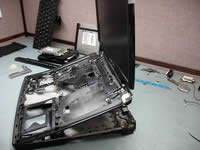 |
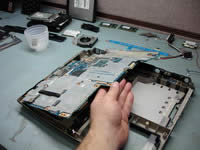
STEP 21
Lift ut the top cover/display assembly as it shown on the photo and remove it from the laptop base.
|
| |
|
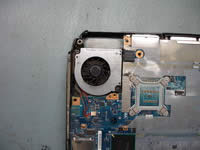 |
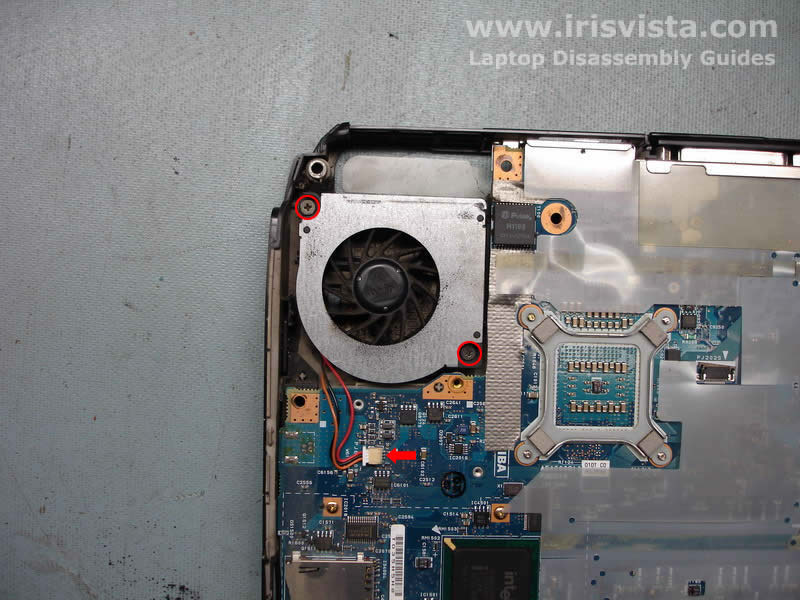
STEP 22
Here we are going to remove the laptop fan.
Unplug the fan cable from the motherboard and remove two screws.
Remove the fan and replace it if needed.
Make sure to blow it off with compressed air before you install it back into the laptop.
|
| |
|
 |
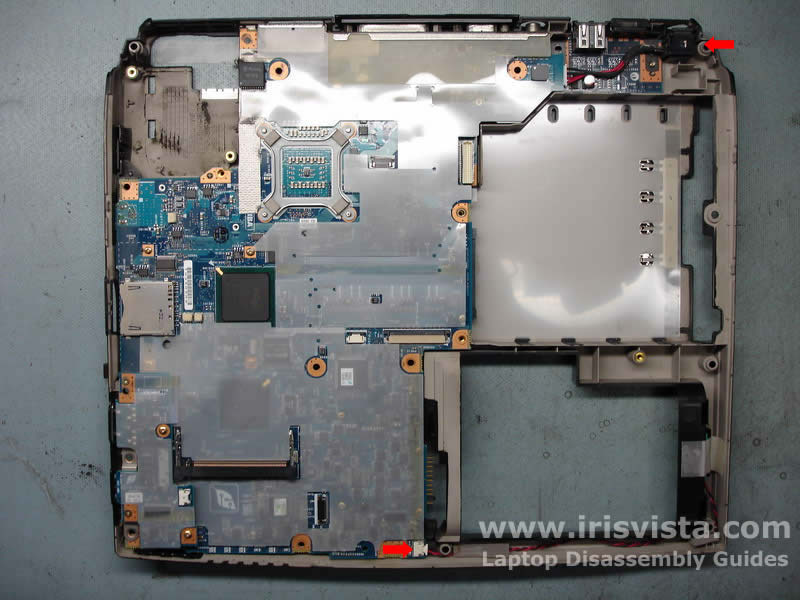
STEP 23
Lift up the laptop power jack from the base.
Disconnect the laptop RTC (CMOS) battery cable shown with a red arrow on the bottom.
|
| |
|
 |
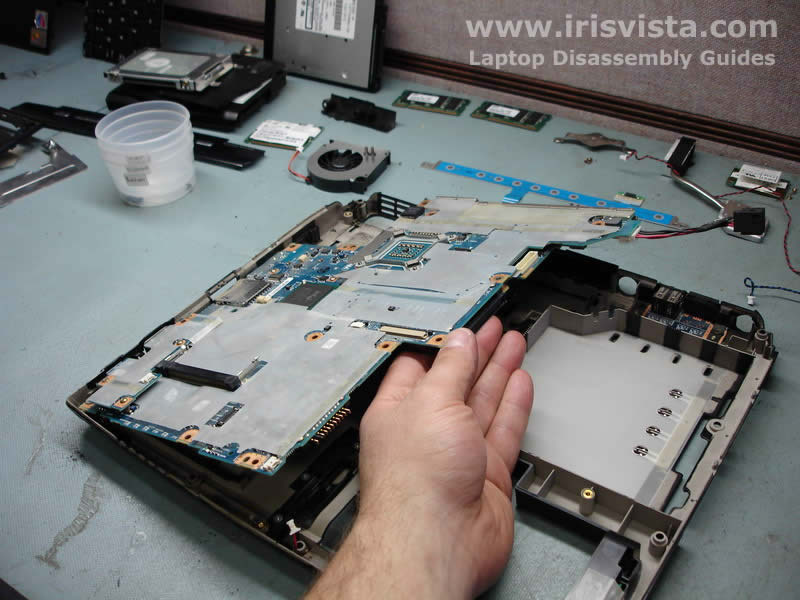
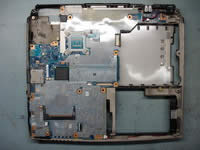
STEP 24
Carefully lift up the right side of the motherboard.
Remove the motherboard from the laptop base.
|
| |
|
 |
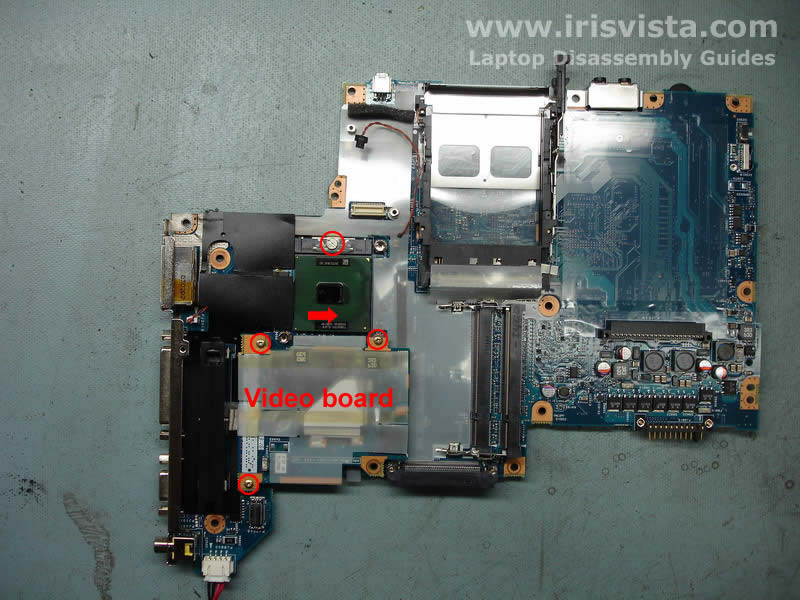
STEP 25
I always remove the CPU at the end because it has a lot of fragile pins. By removing the CPU at the end, you have a better chance not to damage the CPU while it's on your bench.
To order to remove the CPU you'll have to open the socket first. Turn the screw into "Open" position and lift up the CPU.
WHEN YOU INSTALL THE CPU BACK, DO NOT FORGET TO LOCK THE SOCKET OR YOUR LAPTOP WILL NOT START. Before you install the heatsink back on the CPU, apply a thin layer of new thermal grease. You can buy thermal grease in any local computer store or find it online.
Remove three screws securing the video board. Carefully lift up the video board to disconnect it from the motherboard.
|
| |
|
 |
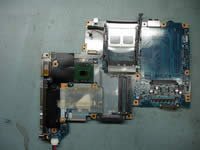
STEP 26
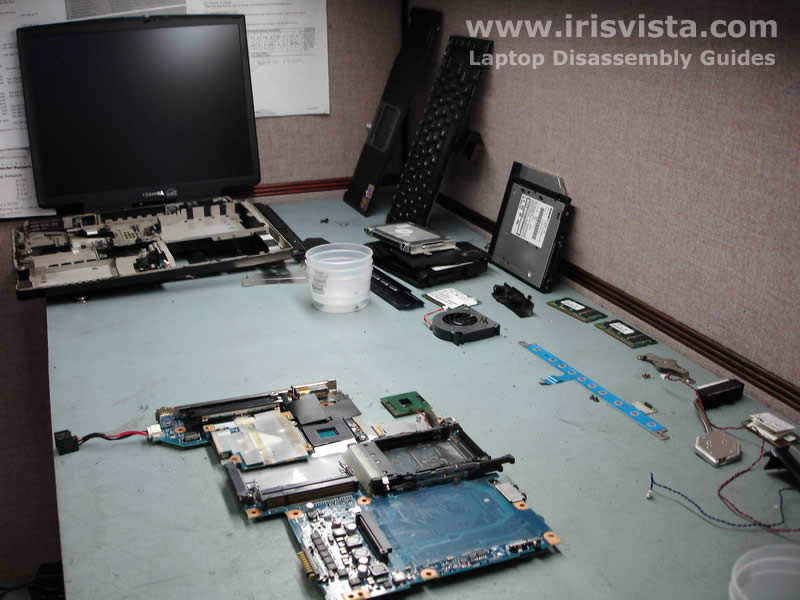
Laptop is disassembled.
Now you can replace the motherboard and assemble it back.
|
|
| |
If you like this manual recomend it to your friends...
Search for Disassembly manuals
PinoutMaster team 2005 - 2024
Service manuals -
Car Audio Unlock-
Elemetnt Datasheets-
|